How To Decorate Christmas Tree with Ribbon
Table of Contents
Summary
Whether you’re wrapping gifts for Christmas, creating decorative accents, or adding finishing touches to crafts projects, knowing how to make a proper bow is essential. Let’s dive into everything you need to know about creating stunning ribbon bows.
Essential Materials and Tools
Before starting your bow-making journey, gather these basic supplies:
- Ribbon (various types and widths)
- Scissors
- Wire chenille stem or floral wire (optional)
- Ruler or measuring tape
- Double-sided tape (optional)
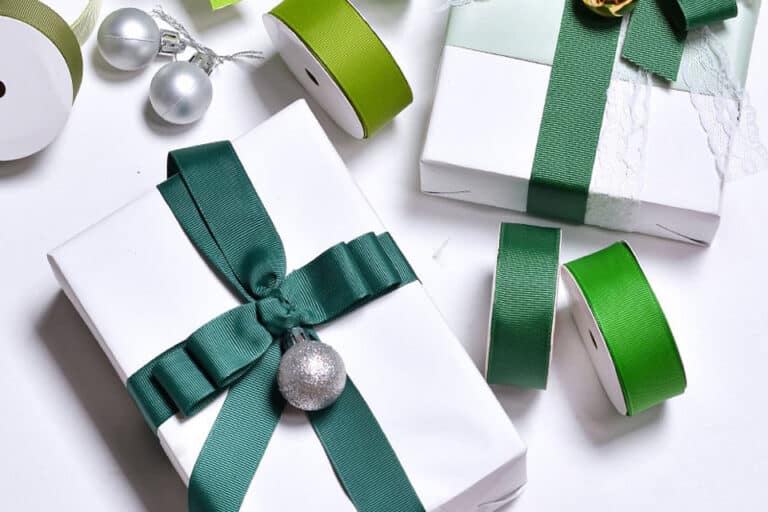
The type of ribbon you choose will greatly impact the final look. Satin Ribbons create elegant, formal bows, while Grosgrain Ribbons offer more structure and durability.
Basic Bow-Making Techniques
Creating a basic bow is the foundation for more complex designs. Here’s how to make a literally easiest bow:
- Cut a length of ribbon (about 12 inches)
- Form a loop in the center
- Cross the ends over to create a center knot
- Adjust the loops side equal in size
- Trim the ends at an angle
Pro tip: For a super easy bow that looks professional, start with equal amount ribbon on both sides before making your first loop.
Creating a Double Ribbon Bow
For a more elaborate look, try this double ribbon bow technique:
- Layer two ribbons of different widths
- Create a loop with both ribbons together
- Form the center bow as normal
- Adjust the ribbon circles loops for symmetry
- Secure with wire if needed
The number loops side can vary depending on how full you want your bow to appear. Note number loops of 4-6 typically works best for most applications.
Advanced Bow-Making Methods
For those ready to take their bow-making skills to the next level:
- Create multiple loop ribbon loop layers
- Vary the size of each layer
- Add wire chenille stem for structure
- Incorporate different ribbon textures
- Consider adding embellishments
Remember: The amount ribbon circles you use will affect the fullness and overall appearance of your bow.
Decorative Bows for Gifts Christmas Tree
- Wired Ribbons are perfect for creating structured bows that hold their shape, especially when decorating gifts christmas tree or wreaths. Here’s how:
- Choose a wired ribbon width
- Create basic loops maintaining shape
- Secure center with wire
- Fan out loops evenly
- Shape and adjust as needed
Tips for Professional-Looking Results
- To achieve that perfect, professional finish:
- Keep tension consistent while making loops
- Use heat-sealed ends to prevent fraying
- Match bow size to package proportions
- Consider the occasion when selecting ribbon style
- Practice maintaining equal amount ribbon for each loop
Common Mistakes to Avoid
- Using too little ribbon
- Uneven loops side
- Loose center knot
- Poor quality ribbon
- Incorrect ribbon type for project
Creative Variations
Experiment with these creative techniques:
- Multi-layered bows
- Two-toned designs
- Cascading ribbons
- Nested loops
- Mixed material combinations
Frequently Asked Questions
How much ribbon do I need to make a basic bow?
For a standard size bow, start with approximately 24 inches of ribbon. Adjust based on desired final size and style.
What’s the best ribbon type for beginners?
Grosgrain Ribbons are ideal for beginners as they hold shape well and are easier to manipulate.
How do I keep my bow from coming undone?
Use wire chenille stem or double-sided tape to secure the center knot. For permanent bows, a few stitches can help.
Can I make bows ahead of time?
Yes! Store pre-made bows in a box with tissue paper to maintain their shape until needed.
What’s the secret to perfect loops?
The key is maintaining equal amount ribbon for each loop and keeping consistent tension throughout the process.
For a standard size bow, start with approximately 24 inches of ribbon. Adjust based on desired final size and style.
Grosgrain Ribbons are ideal for beginners as they hold shape well and are easier to manipulate.
Use wire chenille stem or double-sided tape to secure the center knot. For permanent bows, a few stitches can help.
Yes! Store pre-made bows in a box with tissue paper to maintain their shape until needed.
The key is maintaining equal amount ribbon for each loop and keeping consistent tension throughout the process.
Conclusion
Making beautiful bows with ribbon is a valuable skill that comes with practice. Whether you’re creating a simple gift bow or an elaborate decoration, understanding the basics of bow construction and having the right materials will help you achieve professional-looking results. Remember to start with basic techniques and gradually work your way up to more complex designs. With these guidelines and some patience, you’ll be creating stunning bows in no time.
Remember to visit our ribbon factory for all your ribbon needs and more inspiration for your creative projects!
Comments
Ribbons
-
Satin Ribbons
-
Grosgrain Ribbons
-
Cotton Ribbons
-
Organza Ribbons
-
Velvet Ribbons
-
Special Occasion Ribbons
-
Wired Ribbons
-
Festival Ribbons
-
Ribbon Bows
Custom Cases
Blogs
Contact Us
News & Blog
Learn the latest trends and knowledge from the leading manufacturer in China about ribbon business.